Showing posts with label Electronics. Show all posts

December 15, 2019

The Rubik's Contraption

Jared Di Carlo and I built a machine that can solve a Rubik's cube really fast, and it became kind of internet-famous:

Motor Dynamometer

In 2016 I built an electric motor dynamometer - a device for characterizing the performance of electric motors and motor controllers


The dynamometer is controlled by a Python and QT-based interface which provides manual control of the torque, speed, voltage, and current, simulates loads, or runs through sequences of test points.
The dyno lets me characterize electric motors to generate useful data like efficiency maps:


See the build log here:

September 30, 2014

iPad Retina Display External Monitor

Two summers ago I bought an iPad 3 LCD off ebay.  These are 9.7" 2048 x 1536 IPS panels, which use an internal DisplayPort interface.  In May, I finally got around to building an external display out of the panel, which can be clipped directly onto the side of my Macbook Pro's screen, and is powered by a USB port.

I have been using the display on a daily basis for the last four months, and it has held up beautifully.  It took a little while for my eyes to get used to the tiny 264 pixels-per-inch pixel density, but I can now comfortably use it at native resolution.


The display's build log can be found here.


December 2, 2013

All Terrain Scooter Redux

The original version of my all-terrain electric scooter suffered from a number of problems, the most important of which was in the motors I used.  The triple CIM motors were just not capable of providing both the top speed and acceleration I wanted out of the vehicle.  Actually they could, but just not for very long before the insulation on their windings turned into a melty black mess.

After some attempted snow-scootering during the northeast snowstorm last year, I decided I was sick of the freshly roasted motor smell, and stored away the scooter until the summer.  A full teardown of the scooter revealed enough unnoticed or impending failures that I decided to scrap pretty much the entire mechanical end of the original scooter.

Version 2 features the same HobbyKing LiPo battery pack and Kelly 72V 200A brushed motor controller as the original, but nearly everything else is new.  Replacing the CIMs are a pair of Magmotor S28-200's, which are slightly larger than the S28-150's of battlebot fame.  Like before, the motors are mechanically coupled to one output shaft through a gearbox reduction, and connected electrically in series.

This version also has even bigger wheels (because the old ones clearly weren't large enough...), and over a foot of clearance everywhere.


The scooter's build log can be found here.

March 25, 2013

Electric Tricycle

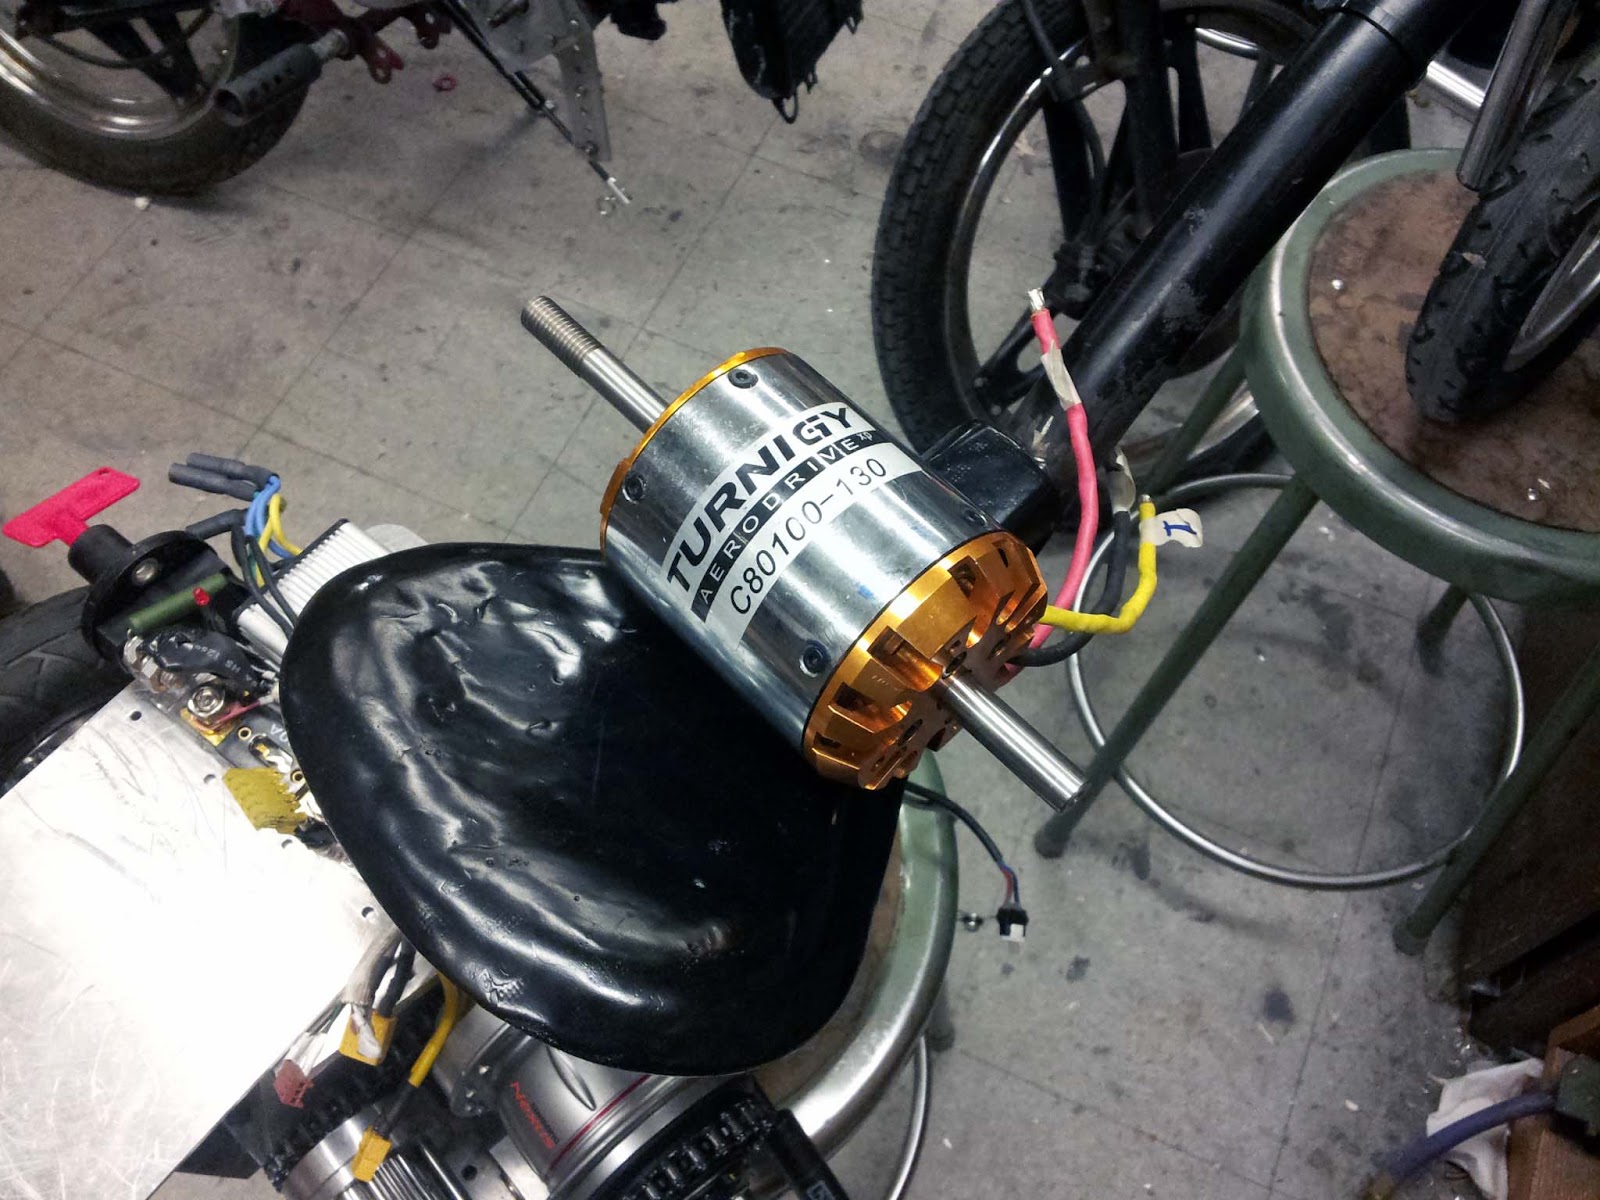
So I built another electric vehicle.  This time around, I actually did some designing before I got any parts, so this was less of a "what do I do with this cool part" project than most of the things I build are.  However, the actual construction of the vehicle was started due to the acquisition of a cool part:  the "melon" sized brushless motor that drives the tricycle.  Getting the motor was a great excuse to implement a bunch of ideas for an electric vehicle I developed after building my electric scooter.

This was my first big project done with access to real machine tools (courtesy of MITERS), so this was both my learn how to machine things and learn how to Solidworks project.  Even with just a semester working with these tools, I was able to make this vehicle significantly more refined (while simultaneously even more ridiculous) than my scooter.

The design for the vehicle was inspired by the classic Radio Flyer tricycle.  That vehicle geometry is not exactly intended for the high speed go-kart like performance I wanted, so I tried to optimize the design while retaining the tiny kids-trike aesthetic.  

And now, a brief overview of the tricycle's specifications:

Motor: Turnigy C80100-130 brushless RC outrunner
Controller: Kelly KBS48121 120A peak BLDC controller
Batteries: 39.6V 7.5 Ah A123 Systems Lithium Nanophosphate pack
Drivetrain: Manual 8-Speed Shimano internal gear hub, custom spur gear differential
Chassis: Welded steel tubing and aluminum plate construction with side-to-side leaning
Top Speed: 45+ mph, if you're feeling brave


More pictures, videos, and build log can be found after the break.

January 29, 2013

Autonomous Anti-Mouse Sentry Turret

For Bad Ideas I built a computer controlled anti-mouse sentry turret.  The turret uses a video feed from a webcam and a slightly modified version of the Project Sentry Gun Processing code to track mouse-sized objects that move across the camera's field of view.  It fires at the objects using a hacked electric airsoft gun on a pan/tilt servo platform.


January 16, 2013

Motorized Projector Screen

After the winter break, I brought a projector I got from old high school's recycling pile back to my dorm with me.   I made a screen for the projector from some blackout fabric, and motorized the raising and lowering of the screen with a small gear motor and some other parts I found.


October 28, 2012

Nyan Hat

I present Nyan Hat, possibly my silliest and most useless project yet.  Nyan Hat was spawned from a late-night discussion involving at various times Halloween, hats, and Nyan Cat, and went from idea to completion in just over two weeks.


July 5, 2012

All-Terrain Electric Scooter

As seems to be the case with many of my projects, for this one, I acquired the parts first, and then designed a project to fit the parts I had. Here is the back story of how I got the parts, and what drove me to use them to build the vehicular monstrosity this post is about.

But first, a brief overview of the scooter's specs:

Motors: 3x CIM motors
Batteries: 8x Turnigy 5000 mAh 4s LiPo packs, 16s2p configuration (59.2V, 10 Ah)
Controller: Kelly KDS72200E, 72V, 120 A continuous, 200A peak
Wheels: 12.5" with knobby pneumatic tires
Deck: Hand laminated carbon fiber with polycarbonate top
Frame: Royce Union Transit kick scooter, with about 200% more aluminum added
Brake: Pedal actuated rear disk (sprocket) brake

Videos are at the bottom of the post.


May 31, 2012

Graduation Glasses

For my high school graduation, students walk onto the stage in pairs, and are expected to do something interesting (most do some variation of a dance move or handshake) when they meet in the middle, before going to their seats.  Having been to my sister's graduation last year, I knew ahead of time that I wanted to make my entrance more interesting and less awkward than the ones I had seen.

I built two pairs of glasses - one for me, one for my walk in partner - that, when turned on, display "2012" across the two pairs.  

March 18, 2012

MIT Tube Hack


This year in their early acceptance tubes, in honor of the 30th anniversery of the great balloon hack, the MIT admissions office sent a note encouraging us to hack our tubes.  Since there were an number of balloons included in the tube, I decided to make my tube hack a tribute to the the great balloon hack.  To fill the balloon, I built an electrolytic cell out of stainless steel washers.  When the cell is placed in water (with baking soda added to increase its conductivity), the current splits the water into oxygen and hydrogen.  This gas then fills the balloon.  When the oxygen-hydrogen mixture in the balloon comes in contact with a flame, the oxygen and hydrogen very quickly combust back into water, producing a very satisfying explosion.


March 16, 2012

Impossible Circuit


As you can see, the circuit consists of two switches, two LEDs, and a resistor in series (and yes, they actually are in series - there are no hidden wires).  So how does each switch control one LED?  Solution after the break:

January 28, 2012

Arduino Game Port Interface

A while back I got my hands on an old analog PC joystick, and since then I have been meaning to build an adapter make the joystick work over USB.  The adapter I finally built consists of an Arduino connected to a game port I hacked off an old sound card.  The Arduino reads the analog (x and y movement) and digital (buttons) inputs and then sends them to the computer over serial.  Then a Processing script running on the computer reads the serial data, and converts it into mouse movements and clicks using the Java Robot class.


November 23, 2011

Retro Rechargeable USB Booster


This project started when I found a 7805 voltage regulator when I was searching through old circuit board for useful parts to scavenge.  Since these chips are often used in DIY USB chargers, I decided to build such a charger, but with some major improvements over the typical 9V battery powered chargers housed in Altoids tins.


Retro Rechargeable USB Booster

August 29, 2011

Tree Climbing Robot

After I got comfortable programming and building with an Arduino, I used my newly acquire microcontroller skills to build a robot.  Using a microcontroller, four high-torque DC gear motors, spiked legs, a linear actuator, rotation sensors, and 3 L298 H-bridge circuits, this robot can climb up trees of varying diameter.  The very long build log follows.


The robot in action:


June 25, 2011

Dual L298HN Motor Driver

I built this motor controller to power the motors for an Arduino-controlled robot I am working on.  It uses 2 L298HN dual full-bridge chips, each of which is capable of powering 2 DC motors at 2A each, with bidirectional control.  You can get up to 3 of the L298HN chips for free from the ST website.  The rest of the parts needed are as follows:

June 23, 2011

GUI Controlled LED Matrix


I recently got an Arduino Uno, and it quickly became my favorite toy.  After learning the basics of how the platform operates, I became interested in interfacing the Arduino with personal computers.  After seeing a large number of LED matrix projects on Instructables and the rest of the web, the LED matrix seemed like a perfect project to attempt to interface with a computer.  


June 5, 2011

Useless Machines

I built three "Useless Machines" within the last few months, and here are two of them.  I made one for my younger sister to decorate and give to her science teacher, and the other out of leftover parts I had.  The circuits of both have been modified from the standard circuit to include an LED strip.  The LED's are wired through the bumper switch, so they only light up when the box is open and the arm is moving.


April 1, 2011

Bench PSU

This is a bench-top power supply built to power my various electronics projects.  It is built from a PC Power and Cooling Silencer 470 watt PSU.